
Super Easy How-To: Bridal Shower Favors
>> Tuesday, June 29, 2010
 I've been a little absent in recent weeks, both in posting here and in tending to my poor little Etsy shop. It's been with good reason though. My sister's getting married on July 10th and I've been busy planning her bridal shower, designing her headpiece with her (more on that in future posts!), and other wedding-related issues-- not to mention the deluge of freelance work I've been pounded with recently (yay!).
I thought I'd share with you one of the crafty little projects that's kept me away (please excuse the less than stellar photos). When my mom and I were thinking about shower favors there were two things that were important to us: 1) they were useful and not a waste of our money and 2) they were reflective of my sister and her soon-to-be hubby. I was also all about it being handmade.
After way too much thought on the subject, I decided to make these cute little flower pots and fill them with sunflower seeds, potting soil, and a gardening trowel. My sister has been talking a lot about wanting to plant flowers recently and she and her fiance love sunflowers (there will be huge ones at their ceremony site and my sister is going to carry a bouquet of cascading sunflowers). I thought this would be perfect (and it's so easy!).
So what do you need to make one of your own?
- Terra cotta pot (I got this one for $1 at WalMart)
- Outdoor paint (Michaels has a section of outdoor patio paint with their terra cotta pots)
- Printed design (more on that later)
- Mod Podge
- Sealer
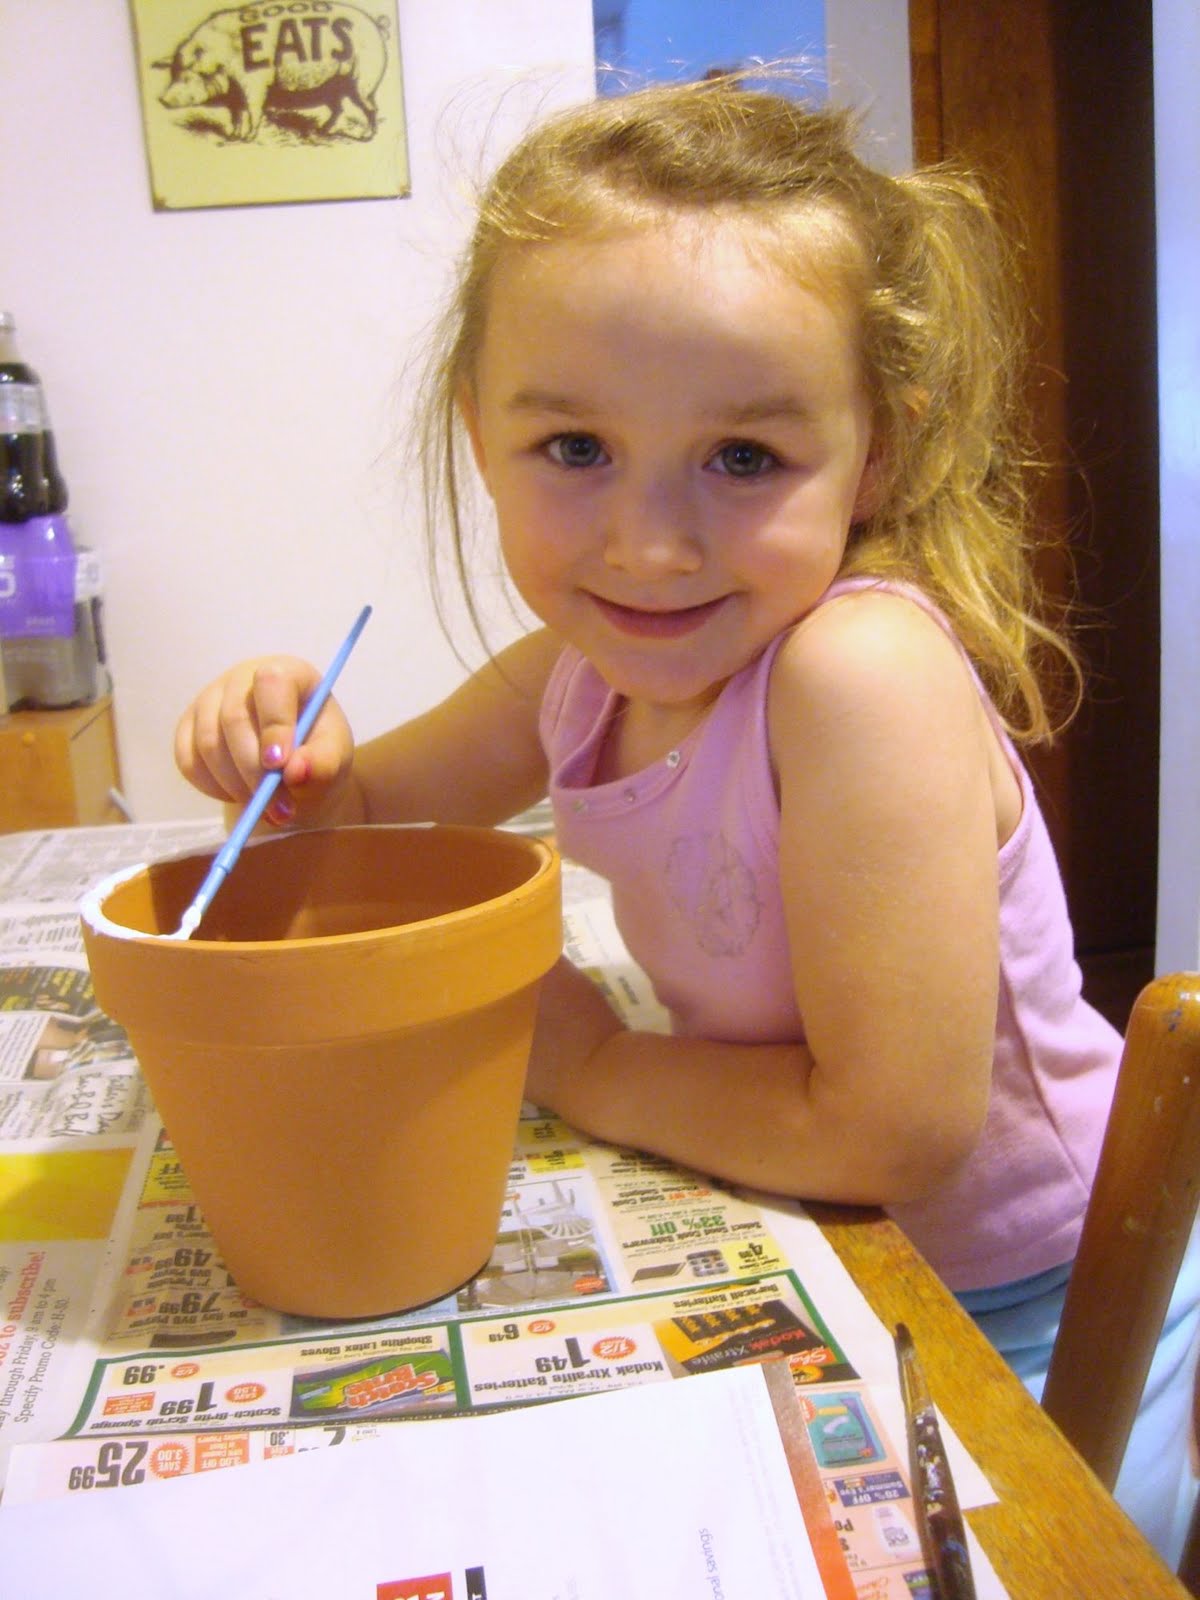 or paint (child labor optional!). I chose white for a sort of shabby chic look. Leave it a little streaky for a look that's rougher or coat it thoroughly for a solid color.
While that's drying, go online to find a picture or pattern that you like. I wanted to play off of the black and white damask invitations we sent out for my sister's shower, so I did a Google image search for "damask". I found one right away that worked perfectly. Another great source for free clip art images is The Graphics Fairy. I could spend hours sifting through all of the images she has collected there! Once you find an image that works for you, print it out (you may have to mess with the size a little on a photo editing program like Photoshop or you can try something like Picnik or FotoFlexer).
After letting the ink dry, cut it out. I chose to cut out the pattern in a little heart shape since we were using these for a bridal shower.
Once the paint on the terra cotta pot is completely dry, you can affix your pattern. Spread a layer of Mod Podge on the back of the pattern and press it onto your pot, being careful to smooth out any air bubbles. Once the image is on, lightly apply a coat of Mod Podge on top of it to make sure it really stays on (please note: some smudging may occur during this step. You can use a clean towel to try and
 wipe away any of the ink that may rub off. Don't go crazy though. Imperfections like those only add to the charm of a shabby chic look).
Let the Mod Podge dry and then coat the whole thing with a sealer for extra protection. Once the sealer dries, your pot is ready. Fill it with flowers, use it to store pens on your desk, the possibilities are endless!
I put a layer of yellow tissue paper in the bottom of mine before placing the trowel and sunflower seeds inside. Next, I filled rounded cellophane bags with potting soil and tied them up with a yellow ribbon.
It was so incredibly easy and the result were these cute little favors that the ladies at our party went wild for!


0 comments:
Post a Comment